1 hour ago
Notifications
Show All1 hour ago
1 hour ago
1 hour ago
1 hour ago
1 hour ago
1 hour ago
1 hour ago
1 hour ago
1 hour ago
1 hour ago
1 hour ago
1 hour ago
1 hour ago
1 hour ago
1 hour ago
1 hour ago
1 hour ago
1 hour ago
1 hour ago
1 hour ago
1 hour ago
This document provides a comprehensive guide to the CoreInteractionSystem, a plugin designed to enable developers to create dynamic and customizable interactions between actors in Unreal Engine. It focuses on simplicity, leveraging Blueprints for quick setup, while still offering flexibility for complex interactions. Below is an outline of the system's components, how to integrate them, and examples of usage.
The Core Components form the basis of the Interaction System. These components—TriggerComponent and ReceiverComponent—allow developers to create interactions between different actors with minimal effort, directly within Unreal Engine's Blueprint system.

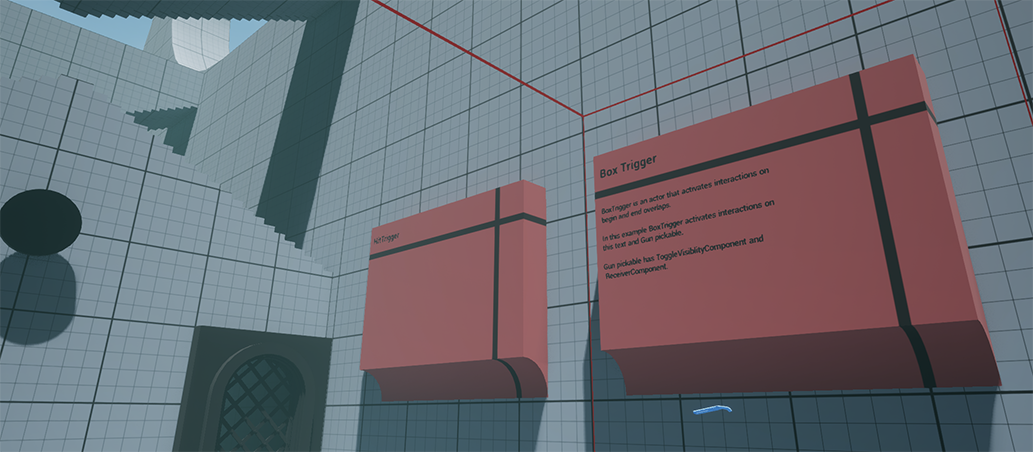
The Trigger Component is used to trigger interactions with actors that have a Receiver Component attached. It allows you to define which actors will be triggered and what actions will occur. You can implement your own interaction logic by calling the ActivateInteractions function. Additionally, the plugin provides predefined actors like BoxTrigger and HitTrigger, which already use the Trigger Component. You can find these examples in Content/Levels/ExampleMap to quickly set up interactions in your project.
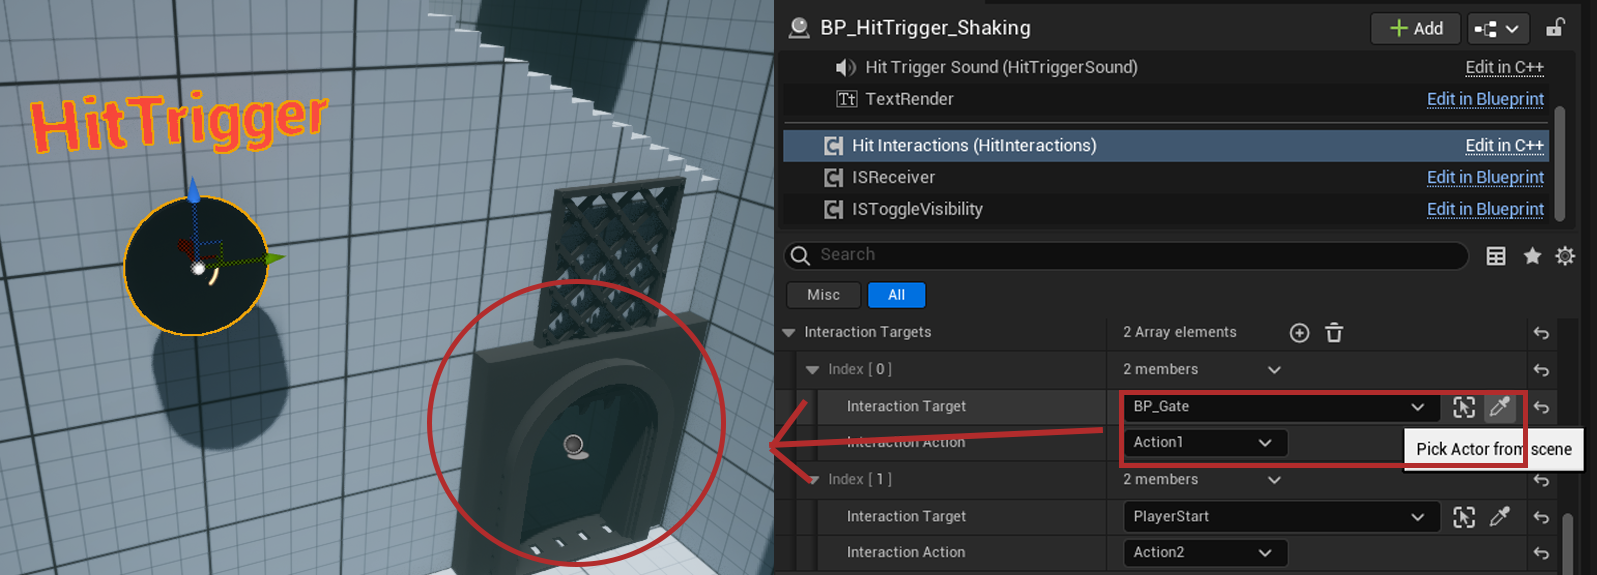
InteractionTargets. Choose the actor you want to be triggered, such as a door, and assign the appropriate action (e.g., Action1 for opening the door).APlayerStart as the target, it will automatically reference the current player, making it easier to create player-based triggers.
Below are the key properties you can configure for the Trigger Component:
Action1 (e.g., Open Door) or Action2 (e.g., Close Door) to specific actors.bInfiniteTriggerCount is false).InteractionTargetsThe InteractionTargets property allows you to define both the actor to interact with and the action that should be executed. For example, you can specify that Action1 (e.g., Open Door) is assigned to one actor, while Action2 (e.g., Close Door) is assigned to another. This flexible setup enables you to control multiple actors with different actions through a single trigger. Additionally, when selecting APlayerStart as a target, the system will automatically reference the current player, simplifying player-based interactions.

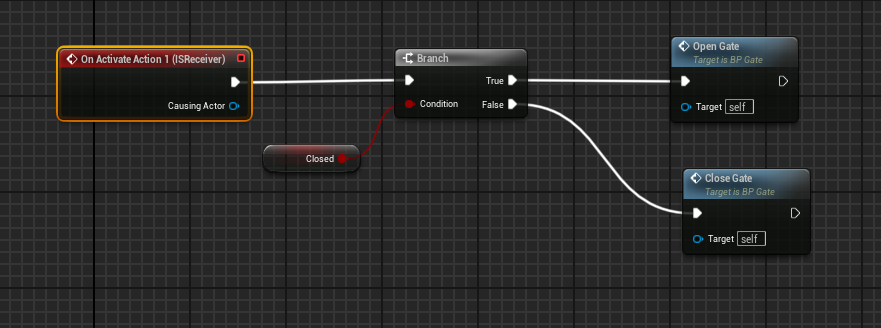
The Receiver Component is the counterpart to the Trigger Component. It allows actors to respond to interactions initiated by the Trigger Component. For example, you can add a Receiver Component to a door, and when a trigger is activated, the door opens. The Receiver Component supports up to 10 action slots, allowing you to define multiple responses in your Blueprint (e.g., Action1 = Open Door, Action2 = Close Door).
Additionally, there are preconfigured actors that come with a Receiver Component already set up, making it easy to integrate them into your project. Trigger actors can also have their own Receiver Components, enabling chain reactions where one triggered actor can further trigger interactions on another actor.
Follow these steps to set up the Receiver Component in your project:
OnActivateAction1).
Below are the key properties you can configure for the Receiver Component:
Predefined Trigger Actors in the Interaction System come with their own Trigger Component configurations. These actors are ready to be used out of the box for typical interaction cases. Below is a list of the available predefined Trigger Actors:
The Box Trigger is a predefined actor designed for proximity-based interactions. It uses a collision box to detect when an actor (like a player) enters or leaves the area. This trigger can activate interactions when overlapping begins and ends, allowing for actions like automatic door opening and closing.
Make sure to configure the collision settings inside BP_BoxTrigger to fit your needs. By default, the collision is set for Pawns, but you can adjust it based on your specific requirements.
Content/Blueprints/Triggers folder.InteractionTargets in the BeginOverlapInteractions and EndOverlapInteractions trigger components.
The Hit Trigger activates interactions based on physical collisions. This trigger is ideal for interactions where an actor needs to respond to being hit, such as destructible objects or targets.
HitTriggerMesh.HitInteractions trigger component to define which actors will receive the interaction.HitTriggerSound property.The Rhythm Trigger is designed for interactions synced with rhythmic patterns, ideal for time-based or beat-based mechanics. It behaves like a "beat machine," allowing developers to record rhythm patterns and trigger interactions accordingly. This is particularly useful for timing complex sequences like moving walls or shooting cannons in platformer-style games.
Developer's Note: I apologize for any overengineering in this actor. Its main purpose is to help time different interactions. A video tutorial will be available to explain the setup in more detail. Watch the tutorial.
bUseKeyRecording property to false. KeyInteractionTargetsMap.bUseKeyRecording property to true. KeytoFKeyMap property allows you to map specific keys on your keyboard to trigger the corresponding interactions during recording. If you need to customize which keys trigger certain actions, you can modify this mapping as needed.
If you want to clear your recording and start over, you can either manually clear the DataAsset file or press the Clear button. This allows you to reset the recording environment before starting a new sequence.
The Group Trigger is an organizing actor that combines both a Trigger Component and a Receiver Component, allowing you to stack multiple interactions into one. It is designed to trigger a group of actors either simultaneously.
These actors demonstrate how to integrate various interactions into your projects using the Interaction System. Each actor responds to specific actions, showcasing how flexible the system is for custom development.
The CameraSpawner spawns actors relative to the player's camera. It's ideal for spawning flying objects or enemies that attack the player.
Offset and BoxExtent.The Cannon fires projectiles and includes visual and audio feedback via the ShakingComponent (recoil), Niagara effect, and sound.
The Gate opens and closes based on player interaction. It uses physics constraints to manage movement.
The Pistol is a gun that can be acquired in the example demo, using the ToggleVisibilityComponent to control its visibility.
The ShowingText actor is for displaying messages in the demo.
The SimpleAudioPlayer plays sound and controls fading out.
The Spikes actor is a trap using physics constraints to activate or deactivate the spikes.
The Physics Object is a ball with physics enabled. It demonstrates how physics can be integrated into the Interaction System.
These actors showcase the flexibility of the Interaction System. You can develop and customize your own receiving actors with any behavior you define, making it versatile for various gameplay scenarios.
The Interaction System includes several Helper Components that developers can use to quickly add additional behavior to their actors. These components are designed to simplify the creation of gameplay mechanics, making it easier to add complex behaviors to your actors.
The HomingComponent allows the owner actor to home in on a target. It is useful for creating projectiles or AI that follow a player or another actor. The component provides options to pick a target directly in the level editor or use a special boolean to automatically assign the player as the target. It also has properties to control oscillation for smoother movement.
SwitchState(EISHomingState::Off) - Turns off the homing behavior.SwitchState(EISHomingState::On) - Turns on the homing behavior.The ShakingComponent adjusts the parent actor's transform over time, allowing you to create shaking effects defined by curves. This is useful for single-use effects like gun recoil or looping effects like camera shakes or hovering animations. It can also simulate larger effects such as earthquakes or explosions.
SwitchState(EISShakingComponentState::Off) - Turns off the shaking effect.SwitchState(EISShakingComponentState::Once) - Activates a one-time shaking effect.SwitchState(EISShakingComponentState::Looping) - Activates the shaking effect in a loop.When bApplyRelativeOffset is set to true, the curves are applied as offsets to the actor's transform, adding dynamic shaking effects. This is perfect for things like gun recoil, target hit effects, camera shakes during impacts, or even simulating an earthquake after an explosion.
Developer's Note: The ShakingComponent can add a lot of “juice” to your game when configured with the right curves, making interactions more dynamic and immersive. I'm considering expanding it in the future to include lattice deformations, providing even more control over the visual effects.
The ToggleVisibilityComponent allows actors to toggle their visibility on and off. This is a simple yet effective way to show or hide objects in your scene, such as making a pistol visible when picked up or hiding it when holstered.